Monday, March 28, 2011

Fructose Free Fun Food


One of the most alluring things about sugar laden treats is the fact that they are usually very pleasing to the eye. It's almost impossible to walk past a display of pastries like this without stopping  for a closer look.

Nice to look at but prepare to pay for damages if you eat!


When I recently set out to make a Birthday Cake for my Daughter
(lover of all things sweet, especially chocolate)
 my goal was to make something visually stunning
to prove that being Fructose Free can be fun and flavorsome.

I am very proud to share with you my
Neapolitan Ice Cream Cup Cake Creation!


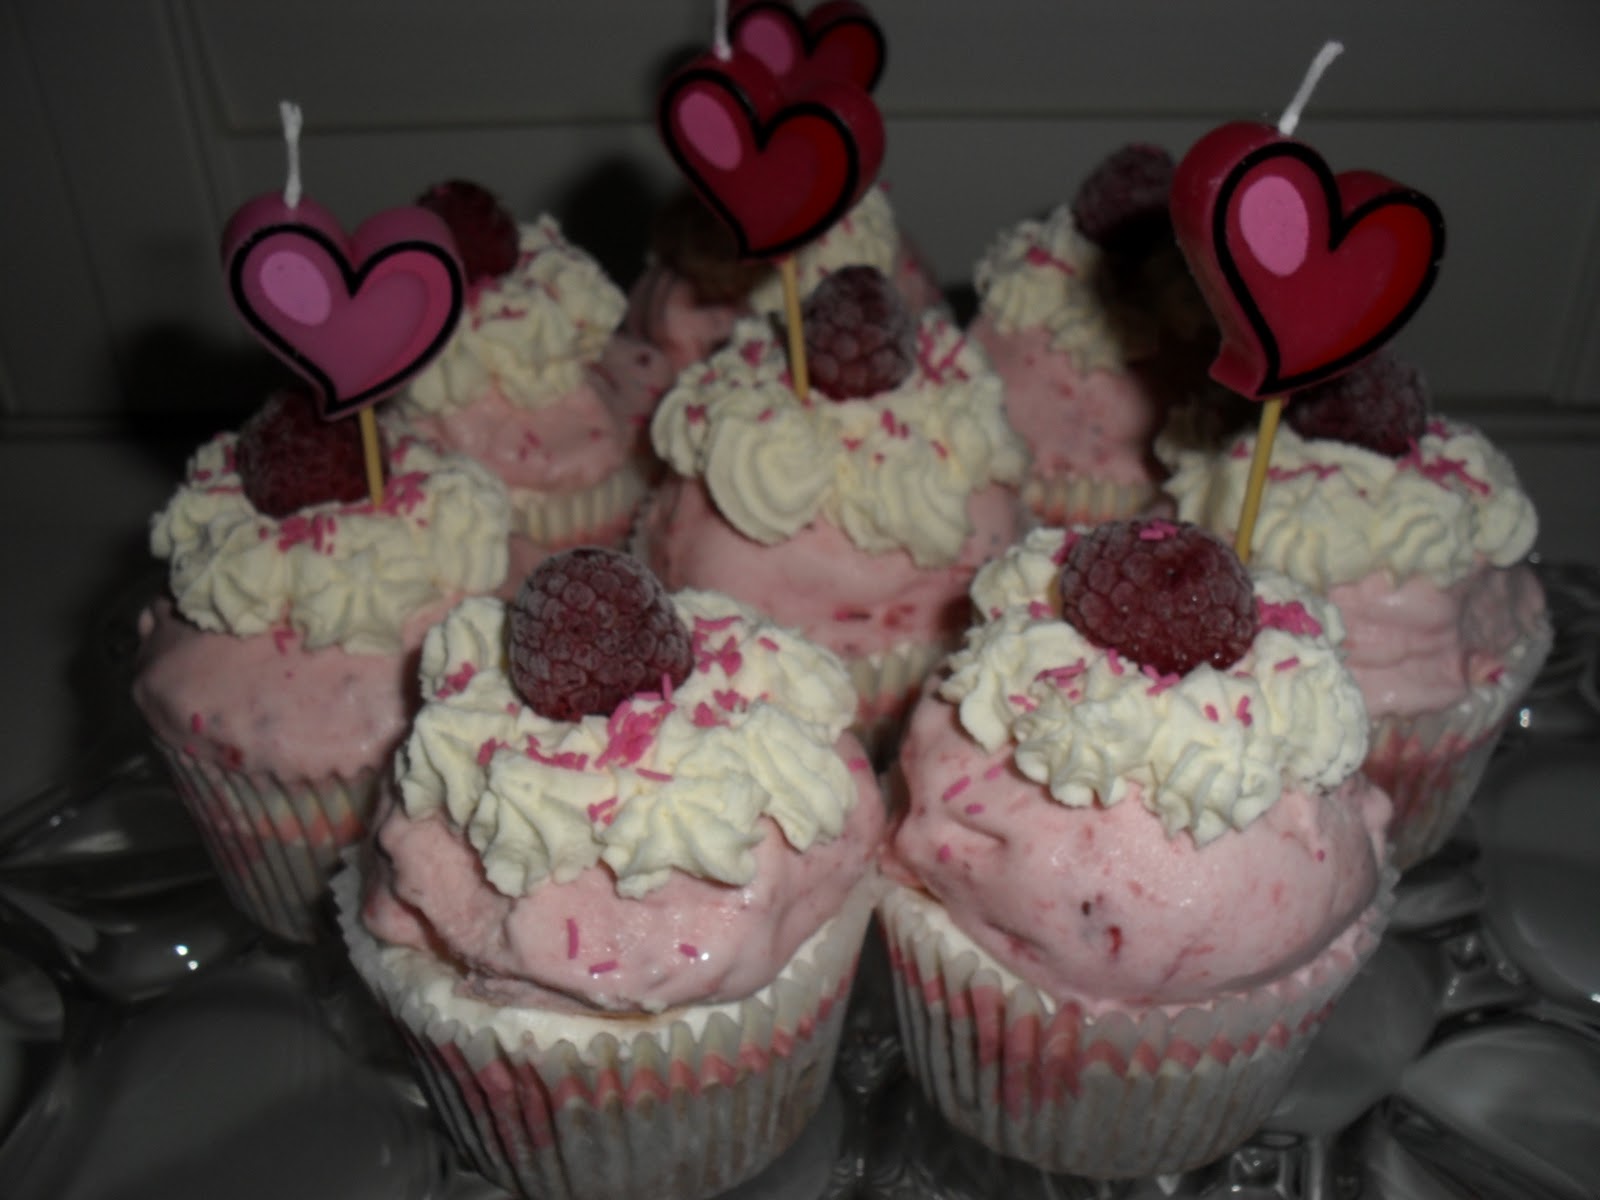
I made  a batch of chocolate ice cream using the recipe from the Sweet Poison Quit Plan. Lined a 12 cup muffin tray with  pretty paper muffin cups. Filled each cup half way with chocolate ice cream and stored in the freezer overnight. 


Next day I made a batch of vanilla ice cream (using the same recipe minus the cocoa). I then filled each muffin cup to the rim with some of the vanilla ice cream. I left the remainder of the vanilla ice cream in the churner because I was going to turn that into strawberry ice cream by adding a puree I had made earlier by cooking in a saucepan a punnet and a half of chopped strawberries, 1/4 cup water and 1/4 cup dextrose until it looks like jam. (Prepare this in advance and chill in the fridge before adding to ice cream)


I also added a couple of drops of red food coloring to the Strawberry mix to get the pretty pink color. An easier option for the strawberry ice cream would be to simply add some strawberry essence and food coloring.


While the vanilla layer was setting in the freezer I put the strawberry ice cream into a container in the freezer to harden a little before I started the next stage.


When the ice cream was firm  I used a spoon to scoop small mounds of strawberry ice cream on top of the vanilla and placed back in the freezer immediately. At this stage I took the cakes out of the muffin tray and worked on them one at a time to prevent them from melting too much.


When the ice cream cakes were well frozen  I then decorated with whipped thickened cream (which I had sweetened with a couple of spoons of dextrose to taste) and topped with a frozen raspberry. I cheated and finished them off with some sugar cake sprinkles that I still had in the cupboard. They are of course an optional extra!


I placed them back in the freezer ready to serve on my prettiest plate topped with the cutest candles.

This cake was very much enjoyed by all (fructose free or not). Good thing is that unlike a traditional birthday cake the leftovers of this cake can be kept in the freezer for weeks! Of course you can make the whole process a lot easier by making cup cakes from one flavor ice cream. (I can't help but show off a bit!)


Talking about showing off. 
Check out what I did with the No-Bake Cheesecake recipe in David's book!

Inspired by memories of The Cheesecake Shop fare I made a strawberry version by topping it with sliced strawberries (while still in the baking tin) and then making a jelly using warm water (about 1/2 cup), 2 tspns gelatine that has been dissolved in a small amount of the water and about 1/4 cup of dextrose. Color (a drop or two of red food coloring) and flavor to taste. ( I used rose water because I don't have strawberry essence) When jelly is cool but not yet set pour carefully over the strawberries and place in fridge to set.
The basic cheesecake is very delicious especially the cooked base made with coconut and almond flakes.

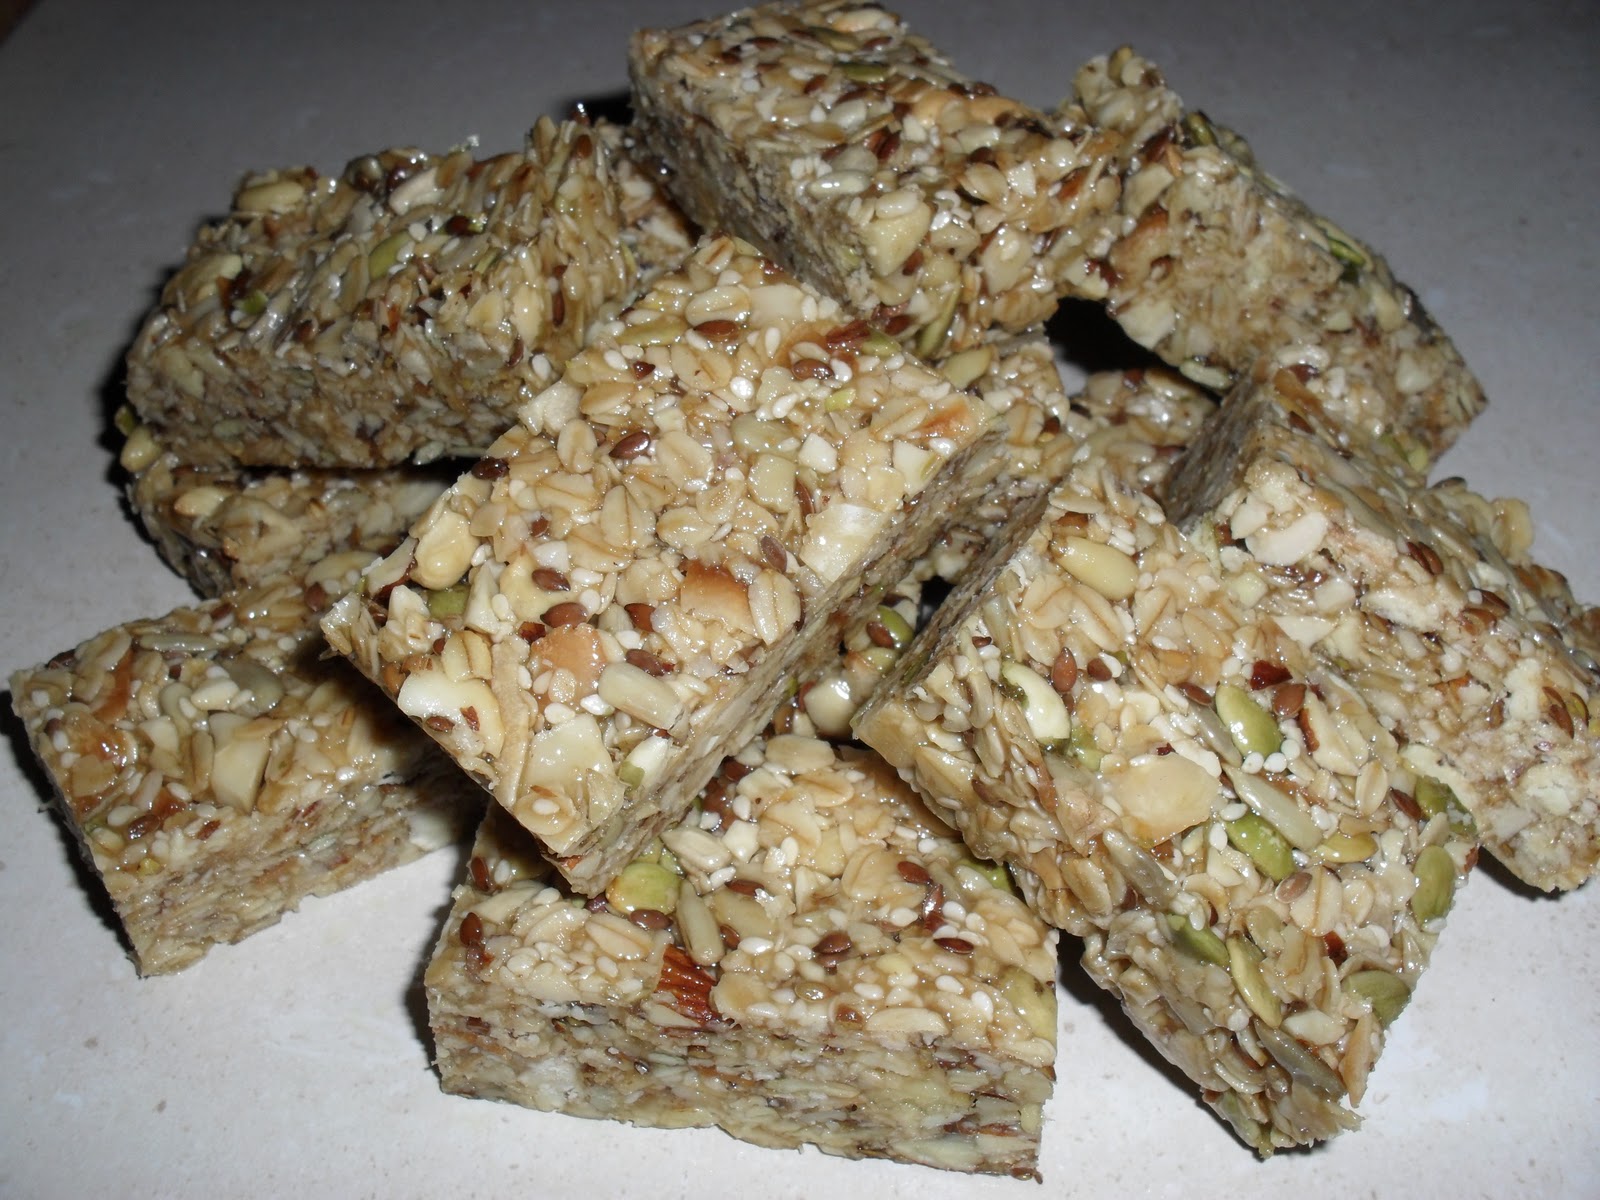
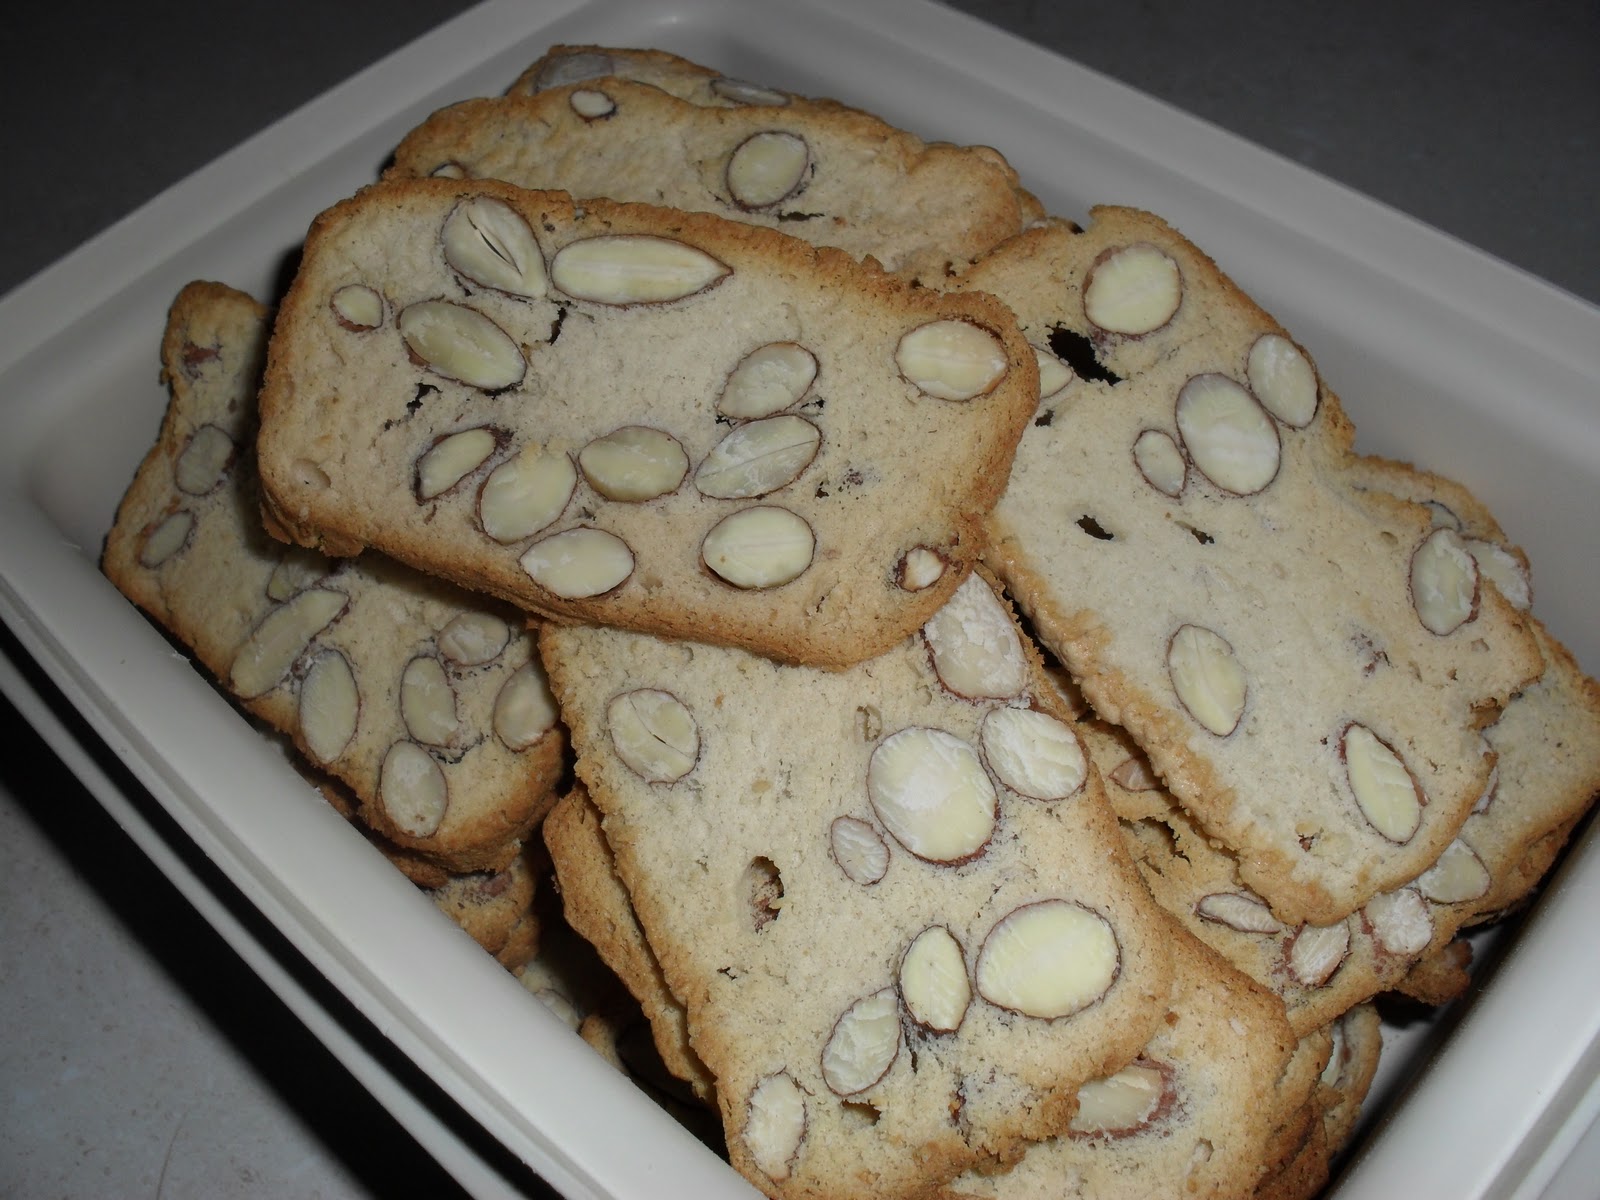
For those of you who prefer something crunchy. 
Here are photos of two more recipes from David's book that I recommend. 
I often wonder if more people would be convinced to give the Quit Plan
a go if the recipes in the book had color photos of the recipes in it.
My guess it would make the book more expensive and possibly seem less credible.

Almond Bread. Perfect With a Cuppa


Anzac Biscuits (my husband's all time favorite)
Finally, I would like to share with you a very special treat that was knitted by my clever daughter.
 The perfect gift for a reformed sugar addict.....Or is it?
100% Sugar Free, 100% Fat Free, 100% Food Free

Sunday, March 6, 2011

Sugar Free Muesli

Inspired by a wonderful company in Australia that makes 97% Sugar Free Muesli which is packed full of nuts I had a go at making a version of my own.

It turned out to be such a delicious and wonderfully satisfying breakfast that I just had to share it with you.

I made a large quantity (3kg). If you want to make less then just adjust the amounts accordingly. It is basically 1/3 oats, 1/3 nuts and 1/3 seeds and coconut.

Chop chop chop....yummy nuts packed with good nutrition
Muesli Recipe
1kg mixed raw nuts chopped.
 (Equal amounts of Cashews, Brazil Nuts, Walnuts, Almonds and Hazelnuts)
1 kg rolled oats
200g sunflower seeds
200g pumpkin seeds
200g sesame seeds
200g linseeds
200g coconut flakes
Chop the nuts. Mix all the ingredients together and store in  airtight containers.
Hey Presto! Yummy Muesli
Now that I have 3kgs of the stuff I thought I might use some of it to make some Muesli Bars. Below is the result of my first attempt. They were very moorish and delicious tasting but ended up rock hard. I had cooked the caramel mix for too long. (I really think it's time to invest in a candy thermometer) To make matters worse I had made them twice as thick as regular muesli bars. I ended up hacking them in to bite size pieces  to ensure that no teeth were broken in the sampling of my fare.
 Mmmmmm..... Crunchy Muesli Bites. Not all bad.

My Crunchy Nutty Muesli Bars 
Inspired by the kind of Muesli Bars I used to feed my kids when they were young (thinking they were a healthy snack) I decided to add some puffed rice to my next batch. I was hoping that this would make them lighter and easier to eat.

Puffed Rice without all the added sugar and salt
  
I bought Puffed Rice in the health food section of my supermarket. It has 1.1% sugar per 100g. I carefully monitored the caramel  making stage and I ended up with Muesli bars to die for! 

My Very Yummy Chewy Nutty Muesli Bars
Maree's Muesli Bar Recipe
3 cups Muesli
2 cups Rice Puffs
1 cup dextrose
125g butter
1/2 cup water
1/2 cup Rice Malt Syrup or Liquid Glucose

Line a 25cm x 30cm baking tray with baking paper.
Lightly toast the Muesli.
Spread it out on a tray and put it under the grill. Pay close attention because the nuts burn easily (especially the coconut). You need to take the tray away from the heat several times and give it a stir around to enable even toasting.
Place toasted Muesli and Rice Puffs in a heatproof mixing bowl.
Place all the other ingredients into a medium saucepan and stir over heat until the butter and dextrose is dissolved.
Bring the mix to the boil and cook until (if you have a candy thermometer it reaches 248 degrees F) or if you don't until it reaches firm ball stage (when you drop a small amount of the mix into cold water and it forms a firm but pliable ball ) Cooking time varies due to size of pan and temperature of hotplate but it takes around 10 to 15 minutes. A good clue is that it's just about ready when the bubbling starts to slow down.
Carefully pour the hot caramel mix into the dry ingredients and stir to combine.
Place mix in lined tray and flatten it down with the back of a spoon.
Cut into bars when cool. Makes approx 24

A six pack to lovingly share with family and friends

Despite cooking and indulging in treats like this my weight continues to drop. I am happy to report that I have now lost 12kg. I still find it hard to believe that I have been able to feel and look so much better by simply reducing my Fructose intake.

My self esteem and confidence has also improved to the point that I now dare to share a profile photo of myself on this blog. In case you have not already noticed it is in the top right hand corner of my blog.

.....and here is another one!
A photo of me and the BBQ taken by me!
This photo is one of a series taken to go with my yet to be published interview with Body and Soul Magazine. Grrrrrr! The reporter initially told me that she would be sending a photographer to my house *thinking glamorous* but in reality I was asked to submit via email a few recent photos of my own. 
Enjoy this exclusive preview!